
*This feature is in beta testing. We would like to hear to your comments or suggestions.
What is a Custom Header?
This special Upverter module is a custom (or customizable) header that allows you to decide what signal you want on each pin of the connector. These new modules are labeled “Custom” on the outline of the module in the Upverter library.
How to use Custom Header?
STEP 1. FIND THE CUSTOM HEADER MODULE
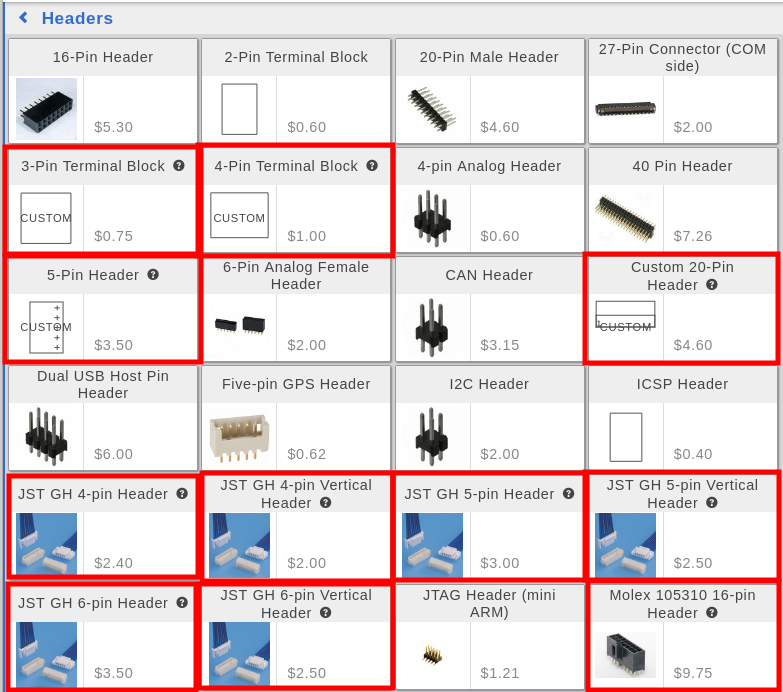
Look for the custom header module you want to use under the Header Category. Below are the different options current available. They are indicated with the word, “CUSTOM” on the module layout.
STEP 2. DRAG THE CUSTOM HEADER MODULE ON THE BOARD.
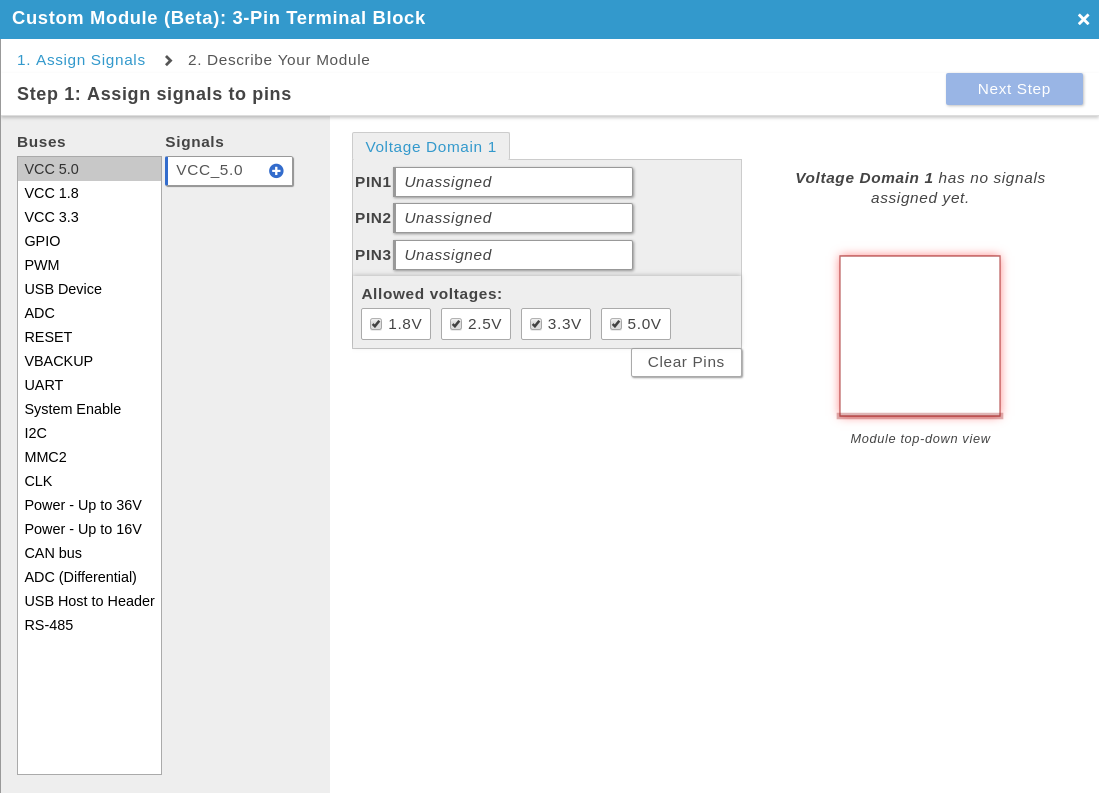
Once a custom header is on the board, a window in the app will open to show you the available buses and signals which you can drag on to each pin.
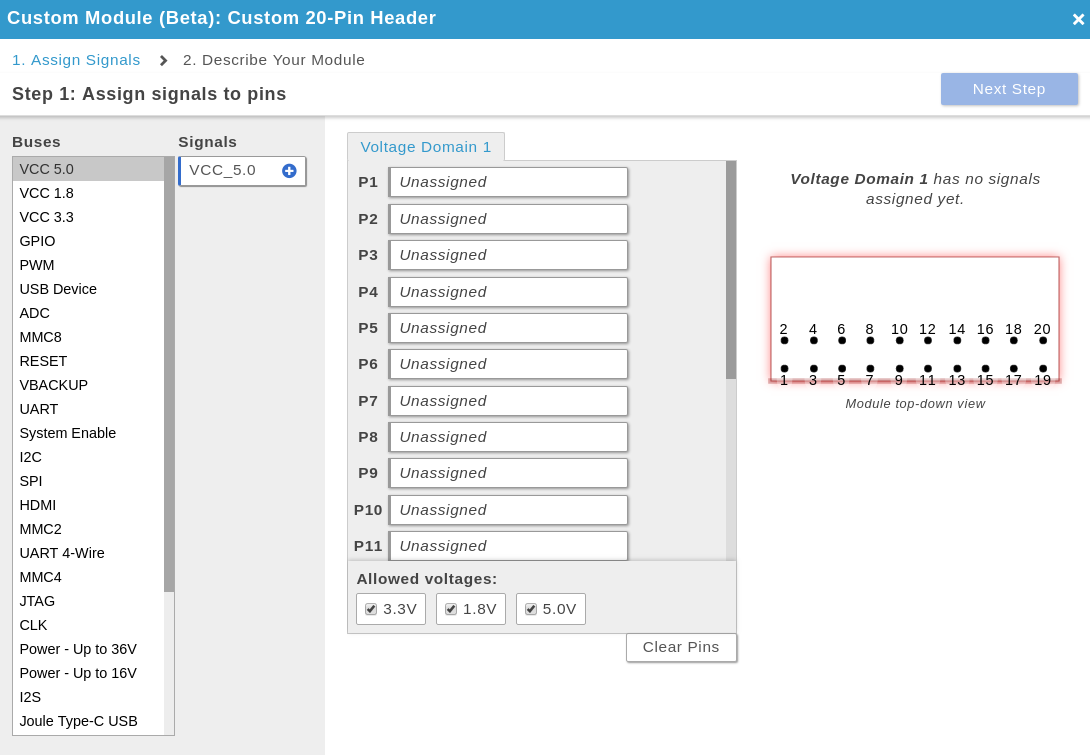
Check the different signals available depending on how many pins is available. Example below is a 3-Pin Terminal Block VS 20-Pin Header:
STEP 3. SELECT BUSES AND ADD SIGNALS
PRO TIP: Right-click on available pins to assign Ground
When you’re happy with the signals on each pin, click “Next Step”.
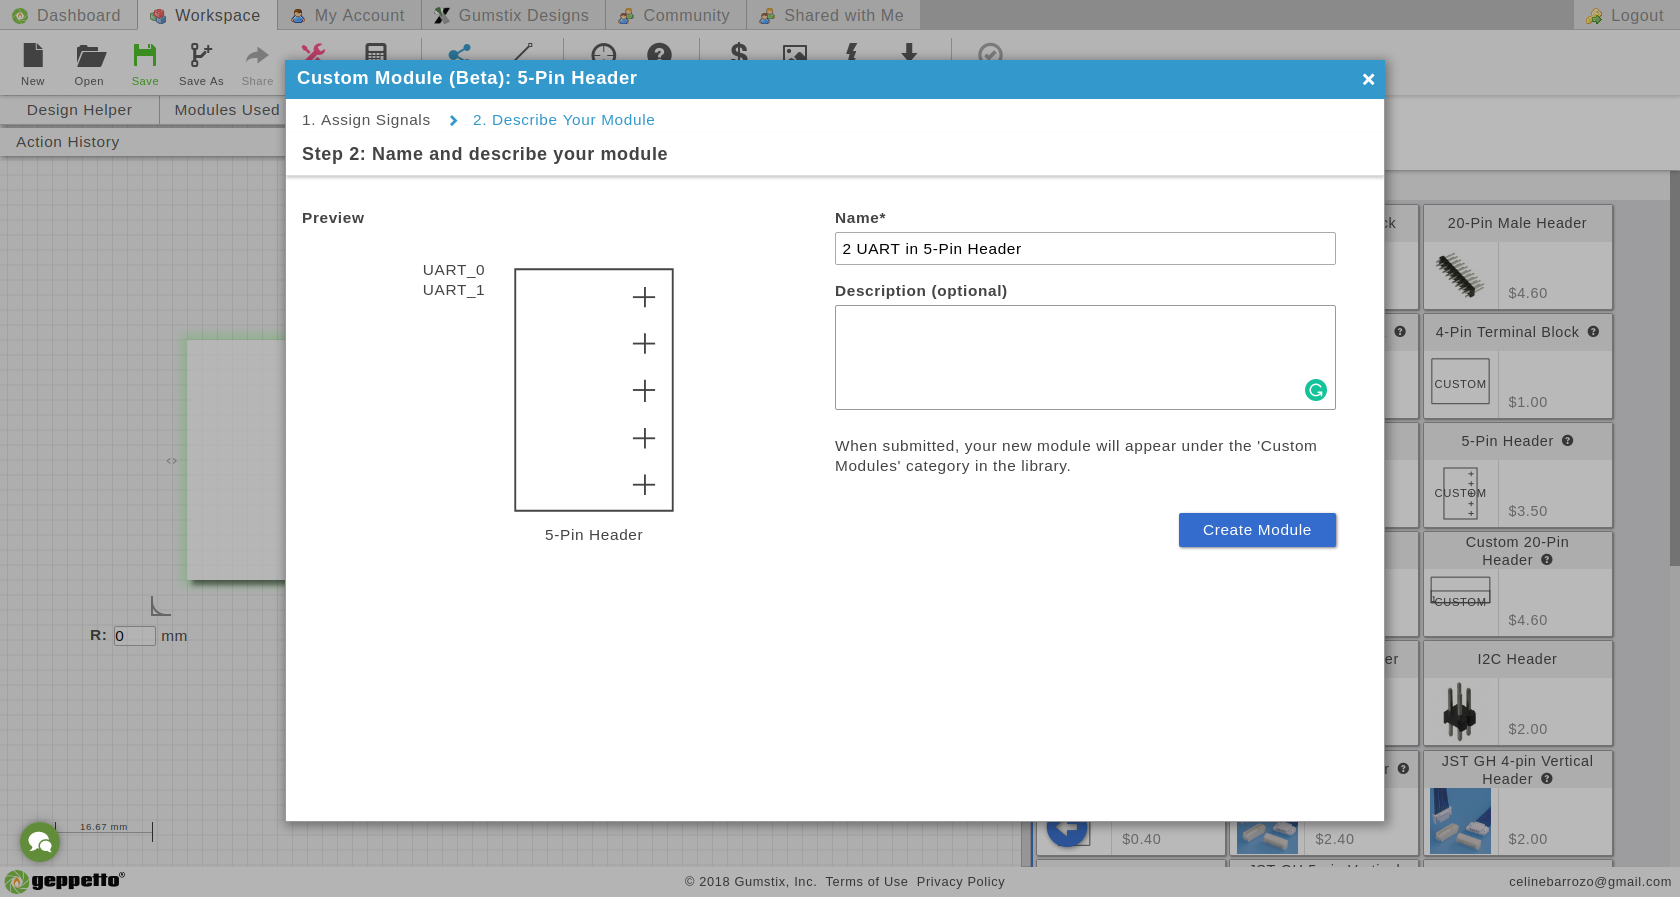
STEP 4. ENTER THE NAME AND DESCRIBE YOUR MODULE.
Make sure your Module Name is useful and descriptive.
PRO TIP: There’s no way for you to edit or delete modules so be sure to name and design them based on your needs.
STEP 5. CLICK “CREATE MODULE”.
There you go! Your custom header is now on your board.
Where to find your headers?
When you saved a custom header a new category will appear, Custom Modules. This will contain saved custom header that you own.

A COUPLE THINGS TO NOTE:
- You can’t share your modules to other users.
- You can add as many of your saved custom headers you need on the board.