Any tips for turning on a prototype for the first time?

I get asked this a lot.

Turning it on is always a nerve-wracking moment. What are some things to keep in mind when bringing up a board?

It’s best to be as methodical as possible. Take it very slow, one small step at a time, and keep detailed notes of what happened at each step. Many people just forge ahead and turn everything on at once, so when something goes wrong, it’s hard to pinpoint the cause.

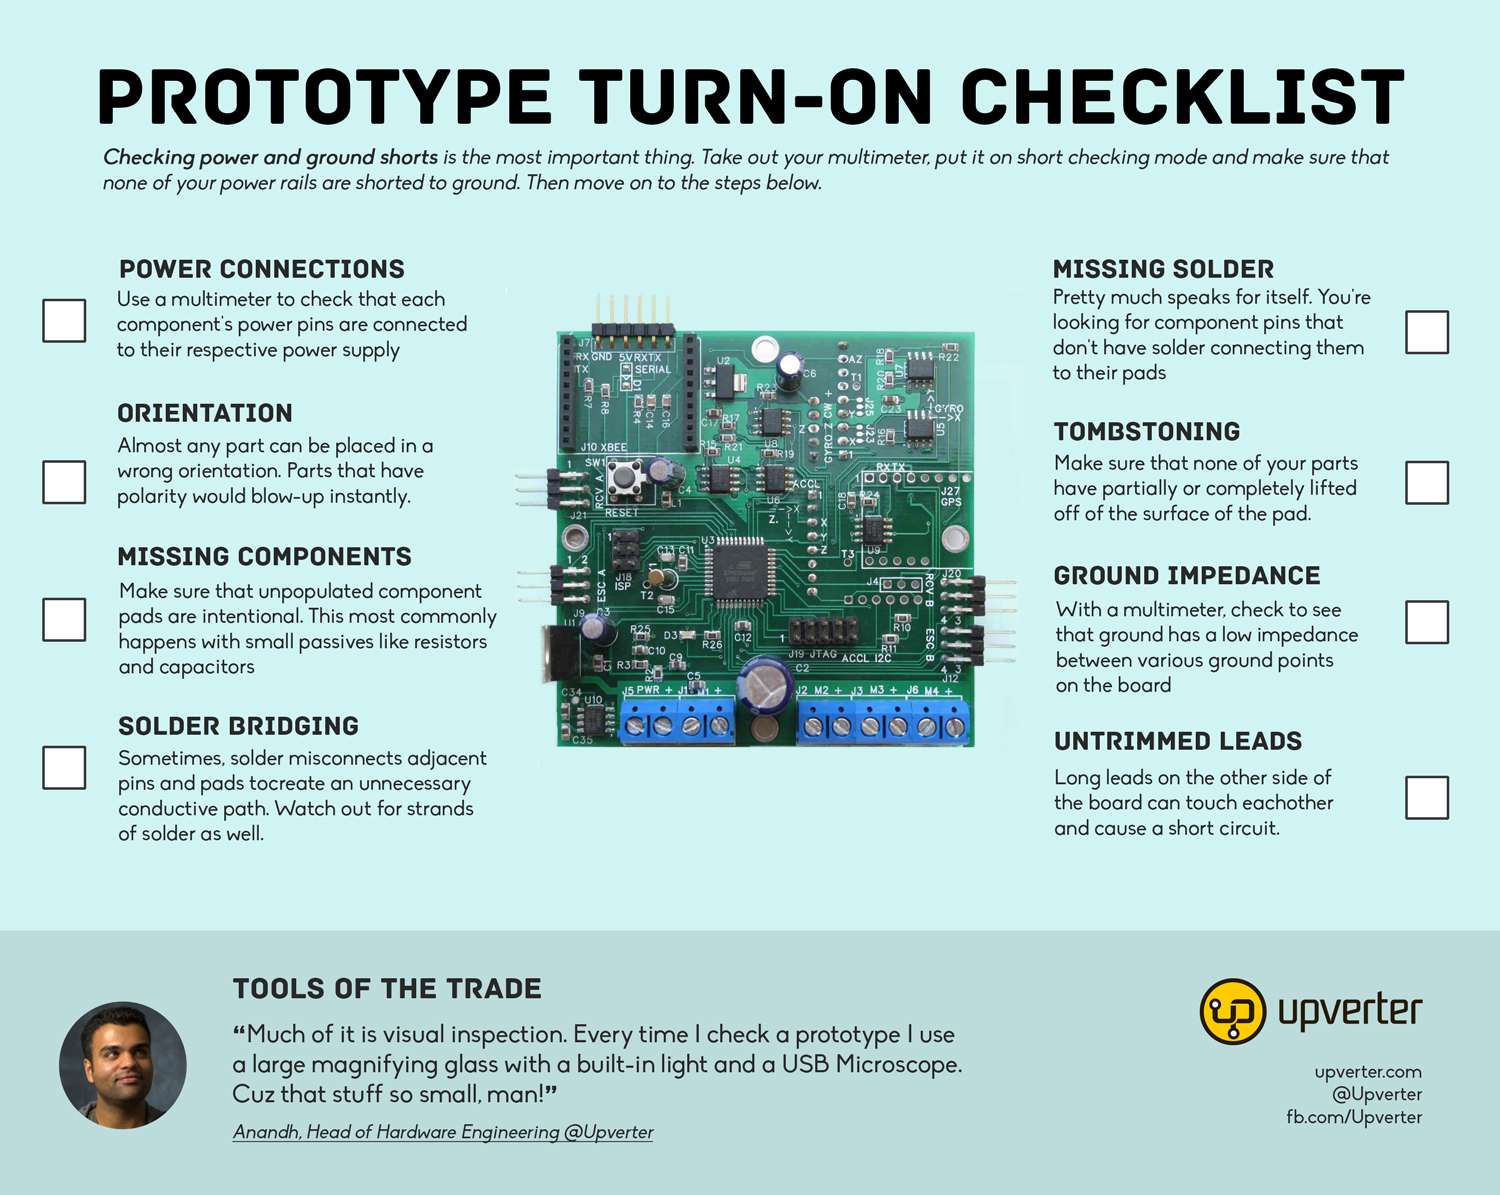
We made a handy infographic with some tips:

1 Like

When I’m assembling the first prototypes for a large project, I’ll often power the board up and do some light testing after assembling each subsection. For example, if I have one or more SMPS on board, I’ll check their outputs under load - that way, if anything blows up, I don’t lose a ton of time or risk the rest of my components.

Some tips I’ve learned over the years:

  1. Always get an unpopulated (bare) PCB. Use the beeper on your multimeter to test for shorts between all the power nets and ground. Repeat this process on the populated boards. This is all just a sanity check. You’d be surprised what you’ll find. If you find any shorts, fix them before turning the board on (obviously).
  2. Always have 3-5 boards made. I’ve heard many HW startup founders wonder why they’d pay for more than 1 or 2 prototypes. The reason is to help with debugging. When something doesn’t work, you can try the other boards to see if they’re affected. This will give you valuable clues into where the problem may be. If only 1 board displays the problem then you know it may be a manufacturing issue. This is especially true during prototyping when you usually don’t pay the manufacturer for comprehensive testing (like you may during production).
  3. Have the manufacturer place unique serial # stickers on each PCB so you can keep track of them in your notes.
  4. As @GeorgeHahn mentioned, turn on each power regulator one at a time (if possible) and test its output. Always start with the power section of the design. Immediately touch parts of the board to see if anything is heating up – shut it down if so.
  5. Put test points on the PCB for each voltage rail so you can power the rail with a bench supply. If a power problem is suspect, this will help you remove the regulator from the equation. This practice has saved me several times.
  6. Take things slow! It’s so tempting to power up the board and start plugging and probing away. Be methodical with testing the power section first, followed by the next logical piece of the design, and the next. Don’t try to be a cowboy. Be like a slow, diligent, turtle. (I couldn’t think of a better analogy :smile: )
  7. This is going to sound lame, but make detailed notes along the way (I use a Google Doc) of exactly what you’ve tried and what behaviours you’re seeing. One of my mentors forced me to do this when I first started and it has been one of the most important design and debug practices I’ve ever followed. I can’t tell you how helpful it is to have detailed notes of your experiments, especially when you’re trying many different little things. It truly helps you organize your thoughts.
1 Like

I would add:

  1. Don’t use a battery or non-limited power supply. Only use a current-limited power supply and set the current limit to exactly as much as you predict the nominal current draw to be. This can often save chips if there’s an unexpected short. You will hear/see your power supply cutting out if the board is drawing too much. Sometimes this is due to you board’s legitimate peak current needs but it forces you to double check and be sure before dumping 500mA into a 10mA part.
  2. It’s great to build up related areas of the board and power them up individually, test, and then build up other areas. But if you are stenciling, pasting, and reflowing the board, this isn’t practical. Instead, design in 0ohm jumper resistors to physically isolate areas. This way you can reflow the whole board but keep the areas separated.
3 Likes

I really like this idea. That’s a great way to isolate sections of the board until you’re ready to power them up.

1 Like